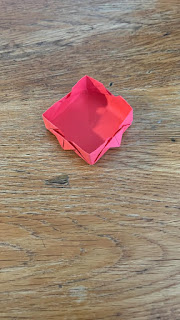
Photo Description: The Basket Weave Box folded from a red note square on a wooden surface.
Text-Only Instructions
Credits and Resources:
This model was folded by me without any external reference or resource. It is likely to be a traditional model, though.
If you are aware of any other source where this model or similar might be listed, please let me know so I can reference it under this heading.
Paper to be used: Square, any size; use large paper to practice with at first.
Folding level: Easy/Beginner
Steps: 11
Description: This is a fairly shallow, open, square box with 90 degree corners. Each side seems to dip down at its center with a small down-pointing triangle with a split down its center being a feature on all 4 sides of the box.
It is a decorative container that vaguely reminds one of a basket with woven details on its sides.
Using two-sided origami or other colored paper will form an attractive pattern, making this box even more eye-catching.
NOTE: This model starts from the Blintz Base. If you are able to achieve this without instructions, fold the blintz base twice, then go to Step 6.
You can also learn about the Blintz and other origami bases at the following link:
Step 1
Place a square down with its edges to the left and right, top and bottom.
Step 2
Fold the left edge over to meet the right edge. Crease and unfold.
Step 3
Fold the top edge down to meet the bottom edge. Crease and unfold.
Step 4
Make the blintz fold by using the method you prefer to fold all four corners in to meet at the center of the square.
When pressed flat, you should end up with a smaller square-shaped model divided into 4 triangles.
Make sure that, as far as possible, all outside corners are folded neatly at a 90 degree angle and that the crease lines all lie straight and meet precisely in the center of the square.
Step 5
Repeat Steps 1 to 4 with the smaller square.
Step 6
Fold each flap back from the center so its point meets the center of each edge of the square.
Crease well.
You will have a figure resembling a picture frame now.
Step 7
Bring the 4 sides in an upright position.
To do this, simply lift up the side of the picture frame from the inside so it is standing up at a 90 degree angle to the table.
It is not yet anchored, but it should stay upright for the moment.
Step 8
Notice that there are still 4 single-layered flaps left at the bottom of your container.
Fold all 4 of these single-layered flaps back in half to meet the corners of the square.
Press flat.
The center of the square will now be smooth, with the 4 triangles you have just folded back at each corner.
Focus on these two-layered triangles in the next step.
Step 9
Now, carefully lift up each folded triangle, both layers, so it is standing straight up.
Pull it up as far as it will go without dislodging the already folded sides of the box.
This step is more a sculpting of the paper than an actual fold. Be careful not to pull too much.
The small corner will move from its flat position into an upright position, supporting the structure of the box from the inside.
Step 10
Pinch each corner so it forms a 90 degree angle.
Step 11
Reinforce all the corners and sides of the box, making sure that the corners are the same height and that the triangles on the sides are pressed flat against the box.
Your Basket Weave Box is ready for use.
Making origami accessible to visually impaired crafters through text instructions.
for non-commercial use only.
Compiled by Lindy van der Merwe, February 2022
Revised, September 2023


Comments
Post a Comment